Saturday, November 24, 2012

BLACK FRIDAY through CYBER MONDAY!!!

BLACK FRIDAY through CYBER MONDAY special!!!!

Make any order of $50 or more through me any time starting Friday till the end of Monday and get FREE SHIPPING!!!


Shop here for this four day only special for FREE SHIPPING!!!

I am having a scrapbooking workshop in December. The RSVPs and money are due by December 3ed. One of my package options is a tiny bit over $50.
So if you RSVP for this workshop and get the Ultimate package, then I will giv you free shipping to bring it to me AND free shipping to ship it to you where ever you are in the USA!!!!
Don't miss this deal!! Look here for more details on my workshop!

December’s Scrapbook Workshop is open to all!

My next workshop will be on December 15, 2012! This workshop is for any and all levels and also I can ship yours to you!


R.S.V.P. and Pre-pay by December 3ed to
Brittany Fitch (Close To My Heart Consultant) at
bfitch08@yahoo.com.

Here are the four different options for this workshop!

Friday, November 9, 2012

My All You Can Make Christmas Card Workshop!

 I wanted to share the easy and yet cute cards that made up my half of the 15 cards that everyone made at my friend's and my "All You Can Make Christmas Card Workshop"! Look out for my next workshop because I will have them available to ship to anyone who isn't local or who can't make the meeting!


These two you saw earlier on my team's blog hop. :-) Wasn't that nice!?! All those awesome projects from all those different creative people! I love our Monthly Blog Hops!


My apologies for the blue card being partially covered. It does show the amazingly easy adhesive sparkle ribbon used to make an adorable little bow on this card!


The stamping of the background on this  card does take less time if you space them out a little more but I like the look when they are tightly stamped, and wanted to show it that way.


 I like the sparkles on one side of the sentiment instead of the usual four corners. It is still more simple than I'm use. With there being allot of first time crafters coming to that workshop it worked well though.
 

The picture doesn't show it but I did add ink to the edges of the sentiment to this one to finish it off. If it was for me I think I would have added some twine to this one.


This was the first time I had done the three layered stamping technique! I loved it! I'm not sure if I'll be doing it for another workshop but I love the way it turns out!


I also can not get over how this very simple card, looks so complete with only a tie in a tiny bit of ribbon added to it!!! I will never underestimate the power of ribbon again! lol


I had some extras of each card after the workshop...so what to do with plenty of copies of cards? So these 5 of the 8 I made are being sold in my etsy shop as a set! :-) You can check out my Etsy shop and see if there is anything that interests you (there are very few listings currently compared to what all things and occasions I can do) or you can just message me and ask about a custom order (I hope that you will ask about anything you are interested in having made that you do not see)!
 
All these cards except for the blue one was made with the Pear and Partridge paper pack, the October stamp of the month, and the stamp set that came with the Pear and Partridge card workshop on the go. Shop with me here for your supplies to make either simple or unique creations! I hope you liked these simpler easier cards that take less time during this busy season and less still look adorable!


Monday, November 5, 2012

My son's Rubber Ducky 2nd Birthday!!!


My son turned 2-Years-Old in October! My biggest wish was for him to have fun and enjoy his party. ...And he did! He loved seeing everyone, running after his cousins trying to hug them, eating pizza and cupcakes, and of course he was very interested in the new toys that he found under some paper. He of course loved getting what ever he wanted and being the center of attention for a few hours! lol
The theme of his party was Rubber Ducky! Some may think it was too young of a theme... but he does like his rubber duckies during and after bath time! ...Plus I knew that this was the last year he wouldn't care about the theme and I wanted to choose a theme he wouldn't want next year.


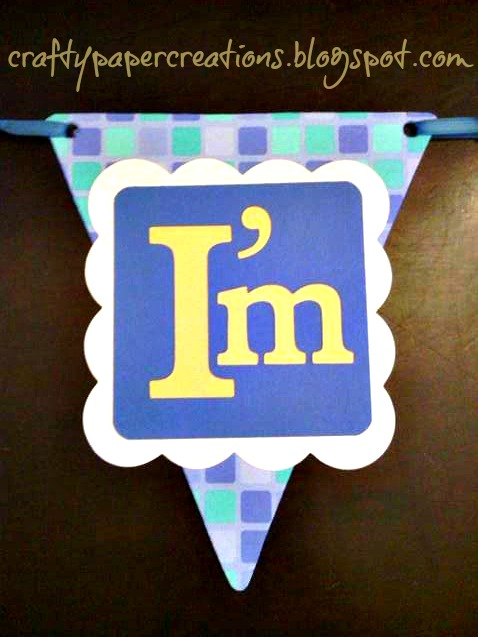
I made his rubber ducky birthday banner using the large chipboard banner from Close To My Heart. This paper is just something I happened to have. The blue pattern paper reminded me of bathroom tiled walls or floor, so I just had to use it! The banner is 5 pieces in all (ducky, I'm, ducky, 2!, ducky). I made scalloped squares to add that bubble look to the banner to match the rest of the decor.


Instead of the traditional scalloped circle cupcake toppers I made these rubber ducky cupcake toppers with scalloped square shape. I made half of the cupcakes them selves blue (turned out more like green since it was yellow cake) and half yellow. I made half of the icing blue and left half white. As you can see in the pictures i did each cupcake with some white and some blue icing. I used an icing bag to do this. (got a little messy since I'm not very skilled at icing)


Jacob seemed to enjoy his cupcake! In the first picture he is taking a bite, in the second picture he is licking the icing off of his lip, and in the third he is licking it off of his chin. HAHAHA I loved these pictures the most and had to share! There is my little man though. I think this is the first picture I've shared with you all on here. He is very independent, very stubborn, and he knows too well that he is handsome.

 
These are the matching little favors. Honestly this was an error fixed. I planned on putting the paper cupcake topper on each side of the york peppermint with the tooth pick to use the favors as cupcake toppers. After making the first one I realised that it was to heavy for the stick to even hold, let alone the soft cupcakes. So I put one side of the paper toppers on the tooth picks to be toppers on the cupcakes and the other half I adhered to the  little york peppermint patties as favors. I did stack them in this pyramid like shape at the party also.

I hope you all like what I created for my son's 2nd Birthday Party! I am going to put the banner on my Etsy shop soon to sell so if you are interested in this banner then feel free to contact me! I would be so thankful if you started following my blog! I have many other cut outs I can make for your next party if you would like also!

Don't forget I have a giveaway going on still right now with a premade card and more than enough supplies to make two of the premade card or whatever your creativity wants to make!
P.S.- I will have the pictures from my very first Christmas Card Workshop up soon!
Related Posts Plugin for WordPress, Blogger...